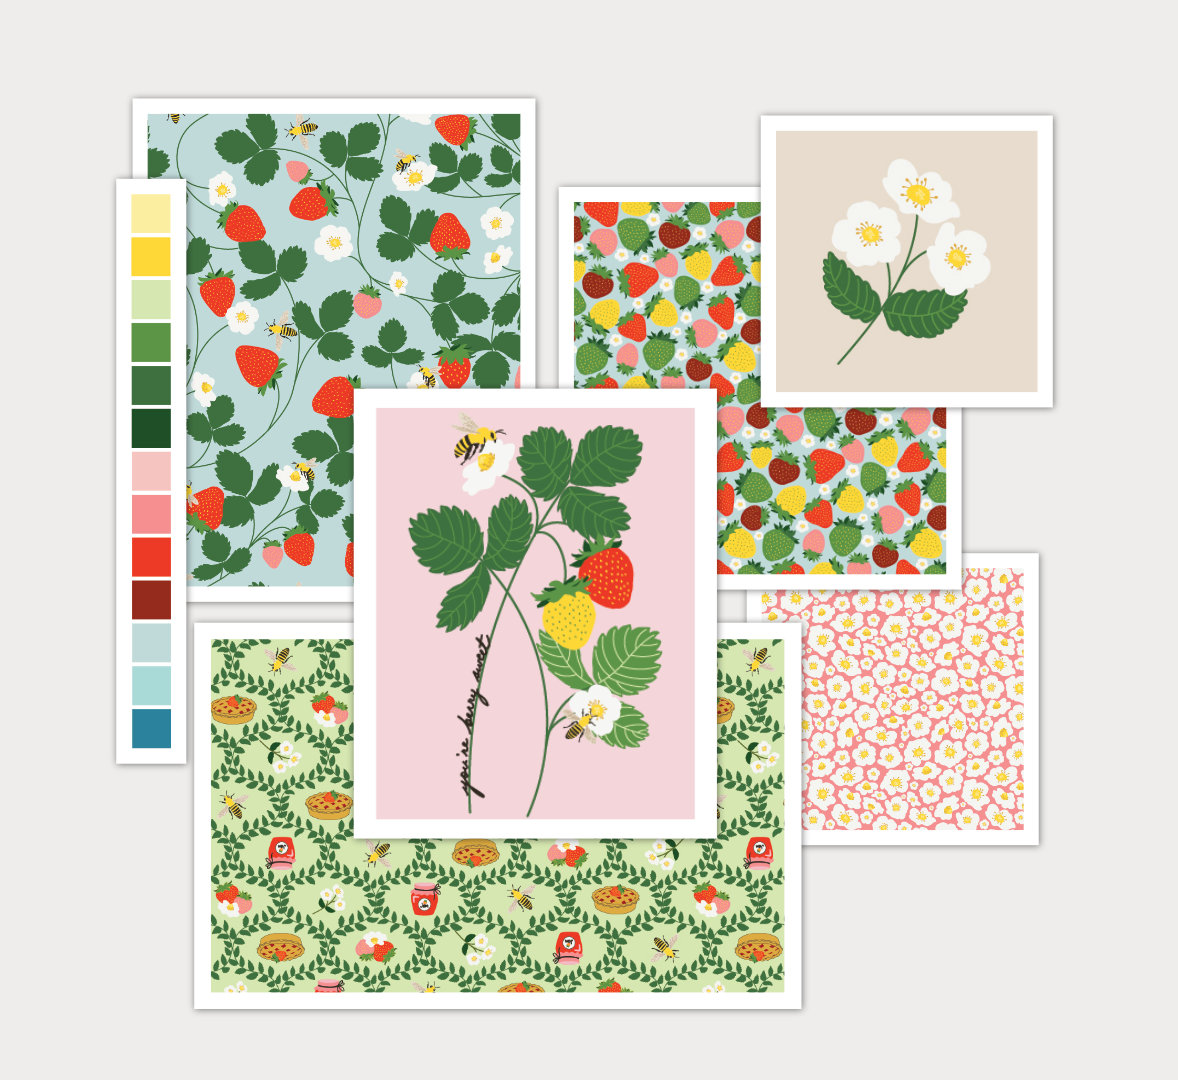
Archive for Occasions and Themes

Jul
30

“In My Thoughts” card with the Word Play stamp set & Nursery Suite DP

Posted: Friday, July 30th, 2010 | Comments (17)

I can’t believe it’s Friday already! I don’t know about you, but to me it feels as though the summer is flying by.  It’s already the end of July!  One more month and the kids will be back to school!  In fact, I’m thinking that when I get back home I’m probably going to have to start my Back to School shopping.  I always find that early August is the perfect time to shop because there is such a great selection and not a lot of crowds to deal with.

The card I have to share with you today is one I created using the Word Play stamp set and Nursery Suite DP.  While great for making baby cards and scrapbook pages for both boys and girls, it works great for other themes as well.

Here’s how I made this card:

  1. Cut a 4 1/4″ x 11″ piece of Pink Pirouette DP, and fold it in half with your bone folder to create a 4 1/4″ x 5 1/2″ card.
  2. Take a 2 3/4″ x 4″ piece of Pink Pirouette CS and stamp your greeting from the Word Play stamp set in Early Espresso Classic ink, at the top.
  3. Center and stick the Pink Pirouette CS piece onto a 3 3/4″ x 5″ piece of Nursery Suite DP – make sure that the top edges are aligned.
  4. Center and stick the Nursery Suite DP onto a 4″ x 5 1/4″ piece of Early Espresso CS.
  5. Lay the matted DP piece onto a foam mat and pierce three holes, all in a row in the top right corner of the Pink Pirouette CS piece. Insert three Early Espresso brads.
  6. Die cut two of the smallest flowers from the Flower Folds Bigz XL die out of pink wool felt (purchased off of ETSY).  Punch a hole in the center of each flower with the smallest hole on the Crop-a-Dile.  Set aside for a moment.
  7. Die cut 1 flower out of Pink Pirouette CS using the Big Shot and the Birds and Blooms die.
  8. Spritz the CS flower with a bit of water and gently crumple and uncrumple.  Repeating until you see the CS layers start to separate. 
  9. Gently pull the petal CS layers apart, leaving the center portion of the flower attached.  Punch a hole through the center of the flower with the Crop-a-Dile.
  10. Layer the two felt flowers and the CS flower one on top of the other.  Insert a vintage brad through the center of the flowers.  Set aside for a moment.
  11. Die cut two swirls out of Old Olive CS using the Big Shot and the Swirls Scribbles die.
  12. Stick the swirls to the bottom left corner of the stamped Pink Pirouette CS piece.  Stick the flower over the ends of the swirls with mini glue dots. You’re done!

Well I hope you enjoyed today’s card.  We’ll be back on Sunday with the release of the August class and workshop planners and a give-away, so be sure to stop by!

Click Here to Order your Stampin’ Up! Products Online 24/7! (Canada Only)

All products are Stampin’ Up! unless otherwise noted.

Stamps: Word Play
Ink: Early Espresso Classic ink
Paper: Pink Pirouette CS, Early Espresso CS, Old Olive CS, Nursery Suite DP
Accessories: mini glue dots, SNAIL adhesive, Vintage Brads, Swirls Scribbles die, Flower Folds Bigz XL, Birds and Blooms die, Crop-a-Dile, light pink wool felt (bought off of Etsy)

Comments (17)

Whew!  What a week.  I think I’m definitely going to need a vacation from my vacation LOL.  We’ve had a very busy, but fun week.  Monday we took the kids to the beach at Fitzroy Harbor, Tuesday we went to the market in downtown Ottawa, yesterday we spent the day at Upper Canada Village, and today we’re headed to Lac Philippe – our annual beach/bbq trip.  When I’m back home next week I’ll be sure to post a few pictures of our various excursions with you.

Today’s card is a very simple card with one of my favourite new sets in the Catalogue, called Have a Seat.  Here’s how I made my card:

  1. Take a 4 1/4″ x 11″ piece of Crumb Cake CS and fold it in half with a bone folder o create a 4 1/4″ x 5 1/2″ card.
  2. Distress the edges of a 4″ x 3 3/4″ piece of Chocolate Chip CS and a 3 3/4″ x 5″ piece of Love Letter DP.  Use your scissor blade to really rough up the edges.
  3. Stamp three chairs in Chocolate Chip Classic ink onto a 2 1/2″ x 4″ piece of Very Vanilla CS.  The three chairs are from the Have a Seat stamp set.
  4. Stamp the greeting beneath the images.  This greeting is one from Papertrey as we didn’t have any coordinating “chair” greetings. I also liked how the type font went with the rustic look of the chairs.  I think it was from the “On the Couch” set.
  5. Sponge the edges of the Very Vanilla CS with Tim Holtz Antique Linen Distress ink and an ink applicator tool.  I just got my distressing kit from SU this week, so I’m looking forward to seeing how that works when I get back.
  6. Distress the edges of the Very Vanilla CS with your scissors.  Punch half of a 1/2″ circle out of the right side of the Very Vanilla CS – slightly below the middle. 
  7. Center and stick the Very Vanilla CS onto a distressed piece of 2 3/4″ x 4 1/4″ piece of Chocolate Chip CS.
  8. Stick a folded piece of Chocolate Chip grosgrain ribbon at the back of the Chocolate Chip CS using a mini glue dot.  Position it so that it is level with the punched half circle. 
  9. Pierce a hole through the center of the 1/2″ circle – so that it goes through the Chocolate Chip CS and through the folded ribbon.
  10. Insert a Vintage Brad through the hole and open up the prongs at the back.
  11. Center and stick the matted image piece to the card front.  You’re done!

I hope you enjoyed today’s card.

Click Here to Order your Stampin’ Up! Products Online 24/7! (Canada Only)

All products are Stampin’ Up! unless otherwise noted.

Stamps: Have a Seat, On My Couch (Papertrey ink)
Ink: Chocolate Chip Classic ink, Tim Holtz Antique Linen Distress ink (Ranger)
Paper: Crumb Cake CS, Chocolate Chip CS, Very Vanilla CS, Love Letter DP
Accessories: paper snips, SNAIL adhesive, vintage brads, Chocolate Chip Grosgrain Ribbon (now retired), mini glue dots, ink applicator tool (Ranger)

Categories : Cards, Friendship
Comments (13)
Jul
27

A Banner Year with Stampin’ Up! & a Card to Share with You

Posted: Tuesday, July 27th, 2010 | Comments (77)

I am so OVER THE MOON excited!  Last night as I was checking my emails there was one from Stampin’ Up!, with the subject line: “Stampin’ Up! Founder’s Circle 2010″.  My heart immediately started pounding, but at the same time I was thinking “this can’t possibly be what I think it is”.  

You see, three years ago (at least I think it was around that time), I was attending my first ever Stampin’ Up! Convention with my upline, and the theme of the convention was “Dream”.  As we watched the video from the previous year’s incentive trip, and as we watched the demonstrators who had earned Founder’s Circle walk across the stage, I turned to my upline and told her that that was my Stampin’ Up! dream – to one day earn the incentive trip and to one day earn Founder’s Circle. 

I acheived my first goal when I earned the Bermuda Cruise which sailed in 2008.  I hit that goal once again when I earned the Alaska Cruise this year (which sails in May 2011).  Although I had a fantastic year with my Stampin’ Up! business, I distinctly remember thinking that while I was proud of my accomplishments, there was no way it was good enough for Founder’s Circle…maybe next year.

Hence, when the email from Stampin’ Up! arrived, I could scarcely believe my eyes.  I was positive it had to be a mistake. There was NO WAY I could possibly have gotten it. When I opened up the email and read these words “Congratulations on achieving Founder’s Circle 2010.  Get ready to celebrate your achievements with a Fabulous Founder’s Circle Retreat…” I thought I was going to pass out LOL.  I was absolutely incredulous….my heart was pounding….I was laughing….I was practically yelling…I was doing the happy dance….

So what is Founder’s Circle?  An exclusive retreat with none other than Shelli Gardner – the co-founder of Stampin’ Up! – and the top 100 demonstrators in the US and top 15 in Canada (as well as a few other top categories such as rising star and performance acheivers).  As an acheiver I’m going to receive “expense-paid travel and accommodations to a beautiful southern Utah location to relax, rejuvenate, mingle with friends and fellow achievers, and stamp!”. According to what the Stampin’ Up! website says “Founder’s Circle achievers enjoy four days and three nights surrounded by the rustic beauty of Utah’s Dixie country. Each year, we visit a breathtaking scene, such as Bryce Canyon National Park, Zion National Park, Cedar City, and Arches National Park. And we always tour Stampin’ Up!’s manufacturing facilities in Kanab, Utah.” 

Isn’t that thrilling? And I have YOU all to thank for it! So THANK YOU from the bottom of my heart – for your support, your encouragement and your investment in me and my business!

Okay, so now that I’m done with my nattering on (can you tell I’m excited?), here are the details on today’s card:

  1. Cut a 4 1/4″ x 11″ piece of Crumb Cake CS (formerly Kraft CS) and fold it in half using your bone folder to create a 4 1/4″ x 5 1/2″ card. 
  2. Round the top and bottom right corners with a 1/2″ corner rounder punch.
  3. Stick a 3 1/2″ x 5 1/2″ piece of DP from the Sunny Garden collection onto the card front, about 1/2″ in from the left edge of the card.
  4. Cut a 2 1/2″ x 5 1/2″ piece of Whisper White CS and stamp the post and the bird cage in Basic Black Classic ink along the bottom of the CS.
  5. Stamp the owl inside the cage in Peach Parfait Classic ink.  Stamp the greeting just above the bird cage in Basic Black Classic ink.
  6. Stick the stamped Whisper White CS piece onto the card front, aligning the right edge of the Whisper White CS with the right edge of the DP.
  7. Lay a strip of Sticky Strip just beside the left edge of the Whisper White CS piece. 
  8. Take your Peach Parfait ribbon – leaving it on the roll - and start ruffling and sticking it to the Sticky Strip.  You want to start by leaving about 1″ overhanging the edge at the top.  As you get to the bottom, leave 1″ overhanging the bottom edge when you cut the ribbon.  Bring the ends of the ribbon around to the back of the CS and stick them down with SNAIL adhesive.
  9. Stick three orange rhinestones, one above the other, in the bottom right hand corner of the Whisper White CS piece.  You’re done!

Well I hope you enjoyed today’s card! Soph will be sharing a card with you tomorrow.

Click Here to Order your Stampin’ Up! Products Online 24/7! (Canada Only)

All products are Stampin’ Up! unless otherwise noted.

Stamps: Aviary, A Word for You
Ink: Basic Black Classic ink, Peach Parfait Classic ink
Paper: Crumb Cake CS, Whisper White CS, Sunny Garden DP
Accessories: SNAIL adhesive, Sticky Strip, Stamp-a-ma-jig, Peach Parfait 1/2″ Stitched-Poly ribbon; Non-Stampin’ Up!: 1/2″ corner rounder punch, orange peel and stick rhinestones.


Comments (77)
Jul
26

Birthday Card featuring the Sweet & Sour Specialty DP

Posted: Monday, July 26th, 2010 | Comments (21)

I hope you all had a wonderful weekend!  I had actually meant to post a card for you Friday since I actually did have one made, but time just got away from me.  This week Soph and I (and our families) are visiting our parents. While it’s good to be “home” and wonderful to see our parents, going away is always a challenge.  There’s just so much packing and preparation, not just for going away, but in prepping to take what work we can with us.  These are the times that Soph and I wish we could hitch up our stamp studios to our vehicles. 

Anyways, we did pre-make all our projects for the blog this week so we will have a project to share with you every day. 

Today’s card is a bright and colorful birthday card made with the Sweet & Sour Specialty Designer Paper.  I have to tell you I just love the bright bold colors and patterns of this paper, in particular the dotted pattern I chose for this card.  It’s at times like this that I wish I could buy singles of our papers, because if I could, I’d for sure stock up on these two patterns.

  1. Take a 5 1/4″ x 10 1/2″ piece of textured Very Vanilla CS and fold it in half with a bone folder to create a 5 1/4″ x 5 1/4″ card.
  2. Cut two 2″ x 2″ squares of the orange dotted DP and two 2″ x 2″ squares of the Rose Red DP.  Stick the DP squares to the card front, leaving about a 1/8″ space in between the DP squares.
  3. Cut a 1 3/4″ x 5 1/4″ piece of textured Pink Pirouette DP and stamp the greeting “birthday” in the bottom right corner of the CS in Basic Black Classic ink.
  4. Center and stick the Pink Pirouette CS strip to the card front with SNAIL adhesive.
  5. Punch a scrap of Pumpkin Pie CS with the Dotted Scallop Ribbon Border punch.  Stick the punched border to the Pink Pirouette CS strip just above the greeting using Tombow Multi-purpose adhesive.
  6. Gather up some chipboard letters that spell the word “happy”.  Ink them up with Pumpkin Pie Craft ink.  Sprinkle on Iridescent Ice embossing powder and heat with your heat tool.
  7. Stick the letters onto the Pink Pirouette CS strip with Tombow adhesive.
  8. “Thread” two Pumpkin Pie buttons with small sliver of Pumpkin Pie CS.  Stick the buttons to the card front with mini glue dots.  You’re done!

Well, I hope you enjoyed today’s card, and we’ll be back tomorrow!

Click Here to Order your Stampin’ Up! Products Online 24/7! (Canada Only)

All products are Stampin’ Up! unless otherwise noted.

Stamps: Fundamental Phrases
Ink: Basic Black Classic ink, Pumpkin Pie Craft ink
Paper: textured Very Vanilla CS and Pink Pirouette CS; Pumpkin Pie CS, Sweet & Sour Specialty DP
Accessories: SNAIL adhesive, mini glue dots, Tombow Multi-purpose adhesive, Dotted Scallop Ribbon Border punch, Brights Designer Buttons, heat tool, Iridescent Ice embossing powder, chipboard letters

Comments (21)
Jul
22

Thinking of You Card with the Woodland Walk DP & Growing Green Stamp Set

Posted: Thursday, July 22nd, 2010 | Comments (24)

Today I wanted to share a card with you that I created using the Woodland Walk DP and the Growing Green stamp set.  My feelings towards this DP have been through a real evolution.  When I first saw it in the catalogue, I thought it was absolutely stunning, and it immediately went on my “have to buy” list.  When I actually received the DP though, I was quite disappointed.  It looked so…..green.  The primary green used in this designer paper collection is Garden Green – probably the least used green that I own. I still have 3/4 of the first package of Garden Green cardstock I bought 4 years ago – which goes to show you how much I like it *lol*. 

Now one of the ways I work on developing my creativity and artistic skills is to force myself to use products that I may not necessarily like.  In fact, sometimes I deliberatly buy things that are “not my style” to see what I can come up with.

As I started working on this card, I was actually quite surprised to find that I did like the DP after all.  I’m actually tickled pink with how this card turned out.  Here’s how I made it:

  1. Take a 4 1/4″ x 11″ piece of Crumb Cake CS and fold it in half with your bone folder to create a 4 1/4″ x 5 1/2″ card.  Set aside for a moment.
  2. Center and stick a 3 3/4″ x 3″ piece of the Woodland Walk DP along the top of a 4″ x 5 1/4″ piece of Early Espresso CS.
  3. Center and stick a 2″ x 3 3/4″ piece of textured Very Vanilla CS along the bottom of the 4″ x 5 1/4″ piece of Early Espresso CS.  The Very Vanilla CS will overlap the DP.
  4. Lay a 5″ piece of Early Espresso Satin Ribbon across the seam between the Very Vanilla CS and the DP.  Bring the ends of the ribbon around to the back of the CS and stick them down with SNAIL adhesive.
  5. Center and stick the matted DP to the Crumb Cake card front with SNAIL adhesive.
  6. Stamp the greeting from the Whimsical Words stamp set in Early Espresso Classic ink onto the Very Vanilla CS, towards the left side of the CS. Use a Stamp-a-ma-jig if necessary. 
  7. Tie a 12″ piece of Early Espresso Satin ribbon in a bow around the first piece of ribbon. Slide the bow towards the right side of the card.
  8. Stamp the rose (I think that’s what kind of a flower it is) onto a piece of watercolor paper with Timber Brown Staz On ink.  Color it in using an aquapainter and Crumb Cake Classic ink. 
  9. Add some highlights to the lines of the flower with the buttermilk Atyou Spica pen.
  10. Cut out a few leaves from a scrap of the same DP used on the card.  Stick them to the back of the flower so that they are peeking out a little, using mini glue dots.
  11. Stick the flower to the right of the greeting on the Very Vanilla CS using Stampin’ Dimensionals.  You’re done!

Well I hope you enjoyed today’s card!

Click Here to Order your Stampin’ Up! Products Online 24/7! (Canada Only)

All products are Stampin’ Up! unless otherwise noted.

Stamps: Growing Green, Whimsical Words (2010 Sale-a-Bration stamp set, now retired)
Ink: Crumb Cake Classic ink, Early Espresso Classic ink
Paper: Crumb Cake CS, Early Espresso CS, textured Very Vanilla CS, Watercolor paper, Woodland Walk DP
Accessories: SNAIL adhesive, mini glue dots, Stampin’ Dimensionals, Early Espresso satin ribbon, Stamp-a-ma-jig
Non-Stampin’ Up!: buttermilk atyou spica glitter pen

Comments (24)